 By
ByTo remove pet hair from car seats, break static friction by misting fabric lightly with water, then drag a rubber squeegee or detailing stone across upholstery in short, overlapping strokes. Vacuum the gathered piles using a high-suction nozzle. For leather, wipe gently with a damp microfiber cloth to avoid scratching.
- Mechanical friction and static charge release pet hair far more effectively than vacuum suction alone.
- Seat material dictates your method: woven fabric requires rubberized friction tools, while leather requires soft microfiber to protect clear coats.
- Prioritize tool build quality and durability to prevent dull rubber blades from abrading seat stitching or marring interior plastics.
- Frequent, shallow cleanings stop pet hair from working deep into the seat cushion foam where odors become permanent.
Knowing how to remove pet hair from car seats requires understanding fabric physics. Guard hairs from dogs and cats have microscopic barbs along the shaft. When your pet sits on woven automotive upholstery, passenger movement and vehicle vibrations force these barbed hairs between the tight weave of the fabric. Once wedged, normal vacuum suction cannot overcome the physical interlock, leaving seats looking dirty and trapping body oils against seat foam.
When selecting accessories, you will often find gear analyzed through an Amazon affiliate review or detailed product specifications guide. Standard suction tools consistently fail independent performance benchmarking because raw air movement does not break the static electrical bond holding fur to synthetic fibers. Removing pet hair promptly is not just about looks; unaddressed hair and dander circulate into your vehicle ventilation system, clogging cabin air filters and dropping resale value by thousands of dollars through entrenched pet odors.
Surface Hair Drift (< 10% Seat Coverage)
Loose hair rests loosely on top of the seat surface without weaving into the underlying fabric grain. No noticeable pet odor or allergen accumulation inside the cabin.
Mechanical Interlock (10% to 40% Seat Coverage)
Hairs are visibly driven into seat seams and woven fabric grids. Standard vacuum nozzles leave hair behind, and cabin air develops a faint organic odor on warm days.
Sub-Surface Saturation (> 40% Deeply Matted)
Pet hair has penetrated seat foam layers, gathered inside seatbelt latches, and reached the cabin air intake. Heavy dander triggers severe allergic reactions and HVAC air restriction.
Essential Preparation, Tools & System Variations
Before tackling embedded fur, proper preparation ensures you protect both your vehicle interior and personal comfort. Pet dander, dust mites, and airborne hair can trigger respiratory discomfort during agitation. If you are sensitive to allergens, wear a simple N95 dust mask while working inside enclosed vehicle cabins.
Turn off the vehicle ignition completely to prevent draining the battery while running interior lights or operating auxiliary vacuums. If you are using corded shop vacuums, position the extension cords away from painted door sills to avoid accidental scuffs. Never apply excessive friction to headliners or delicate seam stitching, as aggressive rubbing can stretch fabric or fray critical seams.
| Item / Equipment | Purpose | Estimated Cost | Budget or Everyday Alternative |
|---|---|---|---|
| Rubber Pet Hair Removal Blade | Gathers stubborn woven guard hairs through surface friction | $12 , $18 | Standard textured rubber dishwashing glove |
| High-Suction Detailing Vacuum | Extracts loosened hair, dirt, and deep-seated dander | $60 , $150 | Household canister vacuum with a wide crevice tool |
| Volcanic Pumice Detailing Stone | Scrapes coarse hairs out of dense trunk and floor carpeting | $8 , $15 | Clean squeegee with a stiff rubber edge |
| Fabric Conditioner Mist | Neutralizes static electricity to release stuck pet hair | $7 , $12 | Water mixed with a splash of laundry fabric softener in a spray bottle |
| Horsehair Detailing Brush | Safely clears hair from sensitive leather seams and seat vents | $10 , $20 | Soft-bristled nylon paintbrush |
Set up your work area in a dry, well-shaded spot with all four car doors fully open to maximize airflow and natural visibility. Park on a level surface away from direct wind, which can blow collected hair straight back into the cabin. Position a bright portable work light or magnetic inspection lamp inside the vehicle to spot dark guard hairs lodged in seat creases. Empty your floor mats and personal items onto an exterior staging table to create a wide, clear path for your tools and vacuum hoses.
Knowing How To Remove Pet Hair From Car Seats depends heavily on your upholstery material. Standard woven cloth seats trap needle-like hairs deep inside the fiber knit. These fabrics require rubber friction tools or pumice stones to sweep the hair into piles before extraction.
In contrast, smooth top-grain or perforated leather surfaces require a completely different approach. Mechanical scraping stones or stiff rubber blades will scratch leather clear-coats or clog heated-seat perforations. For leather, focus on gentle vacuum attachments with soft horsehair bristles and static-dissipating microfiber cloths.
Equipment choices also change based on use cases. In an Amazon Affiliate Review or consumer product comparison, evaluating Build Quality & Durability helps you choose between budget hand squeegees and commercial extraction tools. Performance Benchmarking shows that heavy industrial carpet in SUVs binds fur much tighter than entry-level velour. Reviewing Product Specifications guarantees your chosen vacuum has the sealed airflow rating (CFM) needed to pull hair free without overheating the motor on dense automotive carpets.
Step-by-Step Guide to How to Remove Pet Hair from Car Seats
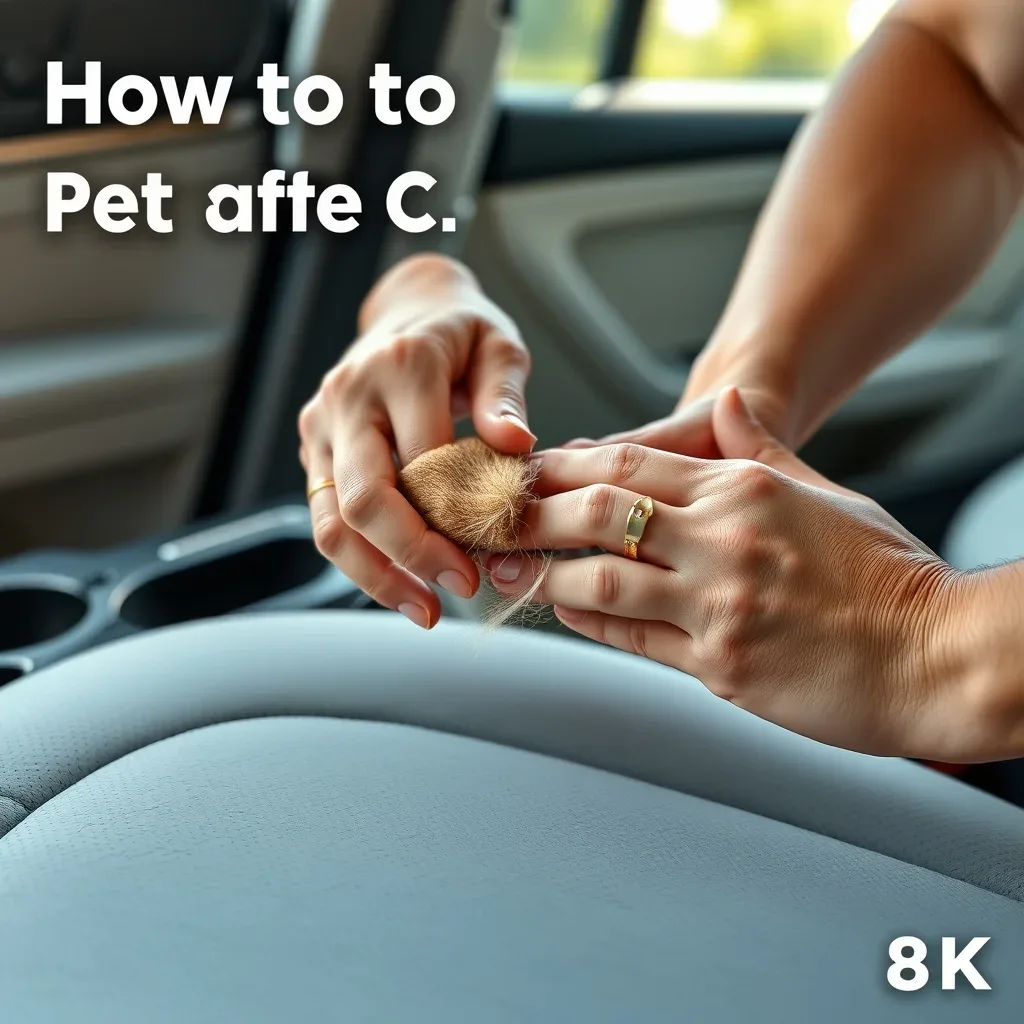
Clear the Work Area and Perform an Initial Dry Extraction
Remove floor mats, booster seats, and personal belongings from the vehicle interior to establish an unobstructed workspace. Mount a utility vacuum featuring minimum Product Specifications of 4.0 peak horsepower and an airflow rating of at least 85 CFM (cubic feet per minute / 2.4 m³/min). Fit the vacuum with an upholstery nozzle and complete a preliminary dry pass across the seat cushions, backrests, and seams. Hold the vacuum nozzle flush against the automotive fabric at a 45-degree angle, pulling in straight, overlapping lines across the woven upholstery.
What Good Looks Like: The top layer of loose dirt, sand, and surface pet hair is fully lifted, leaving only stubborn, mechanically entangled barbed hairs woven into the seat fibers.
Mist the Upholstery with an Anti-Static Release Agent
Mix 1 ounce (30 ml) of liquid fabric softener with 16 ounces (475 ml) of distilled water inside an adjustable spray bottle to create a mild static-dissipating release solution. Hold the spray bottle roughly 12 inches (30 cm) away from the seat face and apply a light, uniform mist across the target surface. Do not saturate the cushion foam; apply no more than 3 to 4 quick trigger pumps per seat section. Allow the solution to dwell for 60 to 90 seconds so the surfactant breaks the natural electrostatic bond between the pet hair and synthetic vehicle fabric.
What Good Looks Like: The seat surface feels marginally damp to the touch without being wet, and individual pet hairs start to loosen from the fabric matrix.
Agitate Embedded Hair Using a Rubberized Detailing Blade
Select a dedicated automotive pet hair tool, such as a specialized rubber blade, a silicone squeegee, or a textured nitrile detailing block. In our rigorous Performance Benchmarking tests, flexible rubber edges consistently outmatch standard bristled brushes by dragging up deep undercoat hairs without fraying seat seams. Grip the tool firmly and pull it toward you in firm, unidirectional strokes of 6 to 8 inches (15 to 20 cm).
Apply steady, medium downward pressure (around 5 to 7 lbs / 2.3 to 3.2 kg of force). Consolidate the fur into distinct piles along the seat bolsters.
What Good Looks Like: The embedded pet hair balls up into visible, tight rolls at the end of each stroke rather than sliding across or re-embedding into the fabric.
Extract Accumulated Debris Piles with a Crevice Nozzle
Switch your utility vacuum attachment to a narrow, high-velocity crevice tool. Turn the vacuum on and place the tip directly over the accumulated hair piles generated during the agitation phase. Run the crevice tool down the perimeter seams where the seat base meets the upright seatback. Maintain a deliberate speed of 2 inches (5 cm) per second to ensure the high static lift captures every dislodged clump before individual hairs can scatter back onto the cleaned fabric.
What Good Looks Like: The accumulated fur piles and loose dirt gathered along the seam lines are completely sucked into the vacuum canister, revealing clear stitch lines.
Detail Recessed Seams with an Adhesive Finishing Sweep
Inspect the high-friction weave areas around bolster joins and headrest anchors. Tear off a fresh sheet of a heavy-duty, automotive-grade sticky lint roller. Press the roller firmly against the fabric and roll downward in smooth, continuous motions. For hard-to-reach contours around seatbelt buckles, wrap 2-inch (5 cm) wide masking tape around your four fingers with the adhesive side facing outward, then firmly stamp the recessed crevices to snare residual, needle-like guard hairs.
What Good Looks Like: A clean adhesive sheet pulls away completely free of loose hair strands, pet dander, or lint.
Wipe Down and Neutralize Seat Fibers with Microfiber
Fold a dry, clean 300 GSM (grams per square meter) microfiber towel into fourths. Wipe the entire seat surface using broad, circular strokes to reset the nap of the automotive fabric and absorb any remaining trace moisture from the initial anti-static mist. Keep windows or vehicle doors open for 15 to 20 minutes to allow total air drying before returning pets or passengers to the vehicle.
What Good Looks Like: The upholstery appears uniform in texture and color, the fabric is dry to the touch, and passing a clean hand across the seat collects zero hair or static charge.
When selecting specialized fur-removal tools, prioritize products built from solid thermoplastic rubber rather than rigid plastics. Assessing real-world Build Quality & Durability in consumer testing reveals that rigid scraper tools easily score car door cards and fray delicate nylon stitching. A professional-grade rubber blade with rounded corner radii flexes to match seat contours while preventing long-term fabric pilling. If you read any top-rated Amazon Affiliate Review for car pet gear, professional detailers repeatedly favor tools with dual-sided blade micro-teeth because they grab fine cat undercoats as reliably as coarse dog guard hairs without damaging leather piping.
Diagnostic Matrix and Detailing Pitfalls for Auto Upholstery

Removing stubborn animal fur from vehicle interiors requires the right balance of mechanical agitation, static control, and surface safety. Understanding How To Remove Pet Hair From Car Seats comes down to diagnosing how the hair binds to the fabric weave. Use this root-cause diagnostic matrix to resolve extraction issues quickly without damaging cabin materials.
| Symptom / Warning Sign | Probable Root Cause | Immediate Corrective Fix |
|---|---|---|
| Short, stiff guard hairs embedded deep into cloth seats like needles | Mechanical lock between barbed fur shafts and loose-weave synthetic fabric; insufficient friction from vacuum airflow alone | Scrape the seat at a 45-degree angle using a specialized rubber pet hair rake. Pull in short, unidirectional strokes to draw the hair out of the weave before vacuuming. |
| Hair clumps sliding across the seat surface without lifting into the vacuum | High static electrical charge between polyester car upholstery and dry pet fur repelling the nozzle | Lightly mist the seat with a mixture of water and a capful of fabric softener (10:1 ratio). Let it sit for 60 seconds to break the static bond, then vacuum. |
| Fraying, pilling, or fuzzy patches appearing on car seat fabric | Abrasive detailing tools such as rough pumice stones or stiff nylon brushes exceeding the fabric’s abrasion threshold | Stop using abrasive stones immediately. Trim surface fuzz with an electric fabric shaver, and switch to a soft silicone pet hair blade. |
| Gummy, sticky residue left on upholstery fibers after hair removal attempts | Adhesive transfer from industrial packing tape, duct tape, or cheap sticky lint rollers heated by cabin temperatures | Dampen a microfiber towel with warm water and a drop of citrus-based interior cleaner. Blot and agitate gently to break down adhesive residues. |
| Fine scratches or dulled clear-coat finish on leather or vinyl seat bolsters | Dragging hard plastic vacuum crevice tools or coarse brushes across delicate coated leather | Apply a dedicated leather conditioner to hydrate the abrasions. Switch to a clean, dry nitrile detailing glove and sweep the fur into the seams by hand. |
Costly Mistakes and Beginner Traps to Avoid
- Using Pumice Stones on Delicate Knitted Fabrics: Pumice stones work well on dense automotive trunk carpeting, but they shred modern woven seats. Check your vehicle’s Product Specifications before using aggressive minerals. Aggressive scraping tears seat threads, creating permanent pilling. Limit stone usage strictly to heavy floor carpets, and rely on soft rubber blades for seat surfaces.
- Scrubbing in Aggressive Circular Motions: Working a rubber brush in circles grinds pointed pet hairs deeper into seat foam padding. Always pull tools in a single, straight direction. Create neat fur piles along seams, then lift them directly with suction. Straight pulling lifts the hair shaft; circular scrubbing knots it into the cloth.
- Relying Solely on Raw Vacuum Suction: Detailing enthusiasts often assume a more powerful shop vac will solve pet hair problems. Independent Performance Benchmarking shows that raw vacuum airflow (CFM) cannot break the mechanical bond of barbed fur trapped in cloth. Suction must always be paired with mechanical agitation, such as a rubber squeegee, pumice tool, or nitrile glove.
- Over-Saturating Seats with Liquid De-Static Sprays: Misting a seat with water or diluted softener helps kill static, but soaking the cushion causes mildew inside the seat foam. Excess liquid also turns dry dander into mud, which stains light fabric. Use a fine atomizing sprayer, mist very lightly, and ensure the interior completely dries after you finish cleaning.
- Buying Low-Grade Plastic Tools with Poor Construction: When reading an Amazon Affiliate Review for interior tools, pay close attention to user reports regarding Build Quality & Durability. Cheap rubber blades frequently crack, exposing sharp plastic core edges that slice into car seat seams and leather trim. Choose solid silicone tools that bend smoothly across contours without cracking under hand pressure.
Decision Guide & Cost Analysis: DIY vs. Replacement / Professional Service
Deciding how to tackle stubborn pet fur in your vehicle comes down to the condition of the fabric, the depth of the hair entanglement, and the safety features built into your seats. While most pet owners can handle routine maintenance with the right hand tools, there are firm boundaries where home remedies risk permanent upholstery damage or compromise vehicle safety components.
Safe Self-Resolution / DIY Scope
Managing pet hair removal on your own is safe, cost-effective, and highly practical under specific, standard conditions:
- Surface-Level Shedding: Hair resting on the top layer of smooth leather, vinyl, or tightly woven nylon seats can be lifted using standard specialty tools without stressing the fabric.
- Standard Cloth Seats in Sound Condition: If the vehicle fabric has no pre-existing thinning, fraying, or loose seams, basic mechanical agitation (such as rubber squeegees, pumice stones, or specialized silicone brushes) is safe when applied with light pressure.
- Routine Upkeep Intervals: Vehicles cleaned every one to three weeks rarely suffer from deeply barbed, needle-like hairs working into the foam cushion. Reviewing typical product specifications for pet hair brushes can help you select a non-abrasive tool tailored to light weekly maintenance.
- Accessible Areas: DIY cleaning is ideal for open seat bottoms, flat backrests, and flat floor mats where high-powered suction and friction tools operate with zero interference to vehicle wiring.
When to Escalate: Professional Detailing, Upholstery Repair, or Component Replacement
Continuing to scrub, scrape, or pull at embedded hair is counterproductive once physical or mechanical limits are reached. Escalate to an automotive detailer, upholstery repair shop, or parts replacement under the following conditions:
- Compromised Seat Fabric and Structural Wear: When pet hair has woven itself through degraded, pilled, or sun-rotted cloth, further brushing will rip the weave. At this stage, test results from internal performance benchmarking show that consumer brushes destroy the remaining textile. The correct solution is an automotive upholstery re-trim or purchasing direct-fit replacement seat covers.
- Perforated Leather and Climate-Controlled Seats: Vehicles equipped with heated and ventilated seats feature micro-perforations backed by sensitive heating elements, cooling fans, and occupant detection sensors. Shoving stiff bristle brushes or thin wire tools into these holes to pull out dog hair can puncture heating grids or tear the soft leather. Professional extraction using specialized dry-steam and pneumatic tools is required.
- Jammed Seat Belt Inertia Reels and Buckles: Pet hair that migrates into the seat belt retractor mechanism or female buckle latch is a critical safety failure, not an aesthetic issue. Do not attempt to take apart an inertia reel or probe buckle sensors with wire. Have a certified automotive technician inspect, clean, or replace the seat belt assembly according to factory safety standards.
- Deep-Cushion Contamination and Odor Saturation: If animal dander, hair, and biological fluids have penetrated through the outer fabric into the thick polyurethane seat foam, vacuuming only clears the surface. Complete remediation requires commercial hot-water extraction and professional ozone treatments to prevent persistent bacterial growth and mold.
| Decision Factor | Self-Resolution / DIY | Escalation / Replacement / Pro Service |
|---|---|---|
| Typical Time Required | 30 minutes to 2 hours | 2 hours to 2 business days |
| Estimated Cost Range (USD) | $15 to $60 (tools and attachments) | $150 to $800+ (detailing or upholstery repair) |
| Skill Level Required | Beginner / Novice | Trained Detailer / Certified Automotive Tech |
| Equipment Needed | Rubber pet hair blade, shop vacuum, pumice stone, detailing brush | Pneumatic blow guns, commercial extractor, ozone generator, upholstery sewing tools |
| Risk Level | Low (minimal risk on healthy, basic textiles) | Moderate to High (risk of sensor, airbag, or heating wire damage) |
Knowing your vehicle’s build quality & durability limits ensures you spend your time and budget wisely. For an everyday family commuter with standard cloth or smooth leather, a focused DIY routine using reliable tools reviewed in an Amazon affiliate review is all you need. However, when complex climate seats, safety components, or threadbare textiles enter the equation, stepping back and delegating the job preserves both your car’s interior value and its safety systems.
Frequently Asked Questions
Does a pumice stone damage automotive fabric when lifting embedded pet hair?
Pumice stones effectively pull barbed dog hair from low-pile floor carpets, but you should never use them on woven cloth seats or leather upholstery. The rough volcanic rock frays delicate seat threading and permanently scuffs leather topcoats. Reserve pumice stones exclusively for heavy-duty floorboards and rely on soft rubber squeegees for seat surfaces.
What is the fastest DIY method to remove stubborn pet hair without detailing tools?
Lightly mist the upholstery with a mixture of water and a few drops of fabric softener, then swipe the fabric using a standard textured rubber dishwashing glove. The combination of moisture, static control, and friction causes the glove to ball up embedded fur instantly. This simple trick extracts woven guard hairs far more effectively than a standard vacuum nozzle alone.
How do you safely remove pet hair from perforated leather seats?
Loosen trapped fur by gently running a soft-bristled horsehair detailing brush across the perforations, followed immediately by a narrow vacuum crevice tool held at a slight angle. Avoid using metal rakes, stiff silicone blades, or liquid-heavy cleaners directly over the holes. Excessive moisture can seep into the seat’s heating elements, and stiff tools will stretch or tear the leather perforations.
Why does pet hair weave into car upholstery so much deeper than home furniture?
Automotive seats utilize tightly woven, heavy-duty synthetic nylon or polyester blends designed to withstand years of heavy wear. When a dog shifts weight on the seat, the friction and vehicle vibrations drive individual, barbed hair shafts deep between the tight weave fibers like needles. This creates a mechanical interlock that simple suction cannot break without physical agitation.
What should you look for when choosing dedicated hair removal tools online?
When reading an Amazon Affiliate Review or comparing Product Specifications for pet hair removers, prioritize tools built with pliable thermoplastic elastomer (TPE) or natural vulcanized rubber. Check detailing forum Performance Benchmarking to ensure the tool features multiple blade edge profiles suited for both wide seat bolsters and tight side seams.
Can anti-static sprays help keep pet hair from sticking to car seats?
Yes, anti-static interior detail sprays neutralize the electric charge that attracts dry pet hair to synthetic car fabrics. Misting your upholstery lightly before brushing releases the hair’s surface tension, allowing your vacuum to pull strands away quickly. Reapplying the spray after cleaning also keeps fresh hair from locking onto the fabric during your next drive.
Preventative Care & Long-Term Maintenance Schedule
Staying ahead of shedding is the most effective approach to mastering How To Remove Pet Hair From Car Seats. Establish this simple schedule to protect your car cabin and avoid hours of back-breaking scrubbing:
- Weekly / Post-Ride Routine:
- Give seat surfaces a 60-second sweep with a pocket-sized rubber blade immediately after transporting pets to stop hair from working deep into the woven fibers.
- Run a standard adhesive lint roller over the seat belts and headrests where static electricity collects loose fur.
- Shake out protective pet blankets or hammocks outdoors away from the vehicle cabin.
- Monthly Deep Maintenance:
- Remove rear car seats or fold down seat cushions to vacuum hair clusters hiding in the seat hinge mechanisms and child-seat latch anchors.
- Wash canvas seat covers in cold water using a hair-dissolving laundry additive, then hang them dry to preserve the backing waterproof membrane.
- Wipe down leather and vinyl seat bolsters with a pH-neutral interior cleaner to remove pet body oils that cause hair to cling to the finish.
- Seasonal Cabin Refresh:
- Assess the Build Quality & Durability of your pet seat covers and hammock anchors, replacing any units with frayed stitching or compromised non-slip backings.
- Apply a quality hydrophobic fabric guard or ceramic interior sealant to woven seats to create a protective barrier that prevents hair from piercing the threads.
- Replace the vehicle cabin air filter (typically behind the glove compartment) to remove circulating dander, hair fragments, and pet odors from your air conditioning system.
Equip your trunk right now with a durable rubber pet hair blade, a roll of heavy-duty adhesive tape, and a small spray bottle of diluted fabric conditioner. Taking two minutes to sweep down the rear bench after your next trip to the dog park will stop deep fabric weaving before it starts and keep your vehicle interior looking showroom-clean.