
 By
ByTo choose the right dash cam memory card, buy a High Endurance MicroSD Card built for continuous writing. Look for UHS Speed Class 3 (U3) and Video Speed Class 30 (V30) ratings for smooth 4K recording. Pick a capacity between 128GB and 256GB and format it inside your camera monthly.
- Always choose High Endurance cards rated specifically for constant video recording over standard consumer cards.
- Verify that the card meets UHS Speed Class 3 (U3) and Video Speed Class 30 (V30) requirements to prevent dropped frames.
- Match the maximum storage capacity supported by your specific dash cam model to avoid system crashes.
- Format your memory card directly inside the dash cam every month to prevent data corruption and recording failure.
Understanding Dash Cam Storage Science
Choosing the correct memory card is not just about finding the cheapest or largest option on the shelf. Dash cameras write data continuously in a relentless loop. Every second your car is on, video files overwrite older footage.
Standard consumer memory cards found in phones or cameras are designed for burst photography and occasional file transfers, not 24/7 writing. When you put a standard card into a dash cam, the constant thermal stress and endless read-write cycles cause the internal memory cells to break down rapidly, leading to sudden corruption and lost evidence.
Protecting your vehicle and your legal safety starts with hardware engineered for the job. High endurance cards rely on advanced MLC NAND Flash technology or specialized multi-level cell architectures designed to handle thousands of hours of heavy write cycles. Furthermore, features like Application Performance Class 2 (A2) help the camera quickly manage background tasks and rapid file indexing. Selecting the proper card ensures that when an incident occurs, the footage saves securely without error, protecting you from financial and legal liabilities.
Normal Operation (0 to 1,500 Hours)
The card writes video smoothly, remains cool to the touch during extraction, and passes monthly quick formats without throwing error codes.
Early Wear Signs (1,500 to 3,000 Hours)
The dash cam displays slow card warnings, occasionally locks up during loop recording, or requires frequent manual formatting.
Failure State (3,000+ Hours or Defective Card)
The camera shows a constant “Card Error” message, refuses to save new files, turns itself off randomly, or locks the card into read-only mode.

Step-by-Step Guide to Choosing Your Card
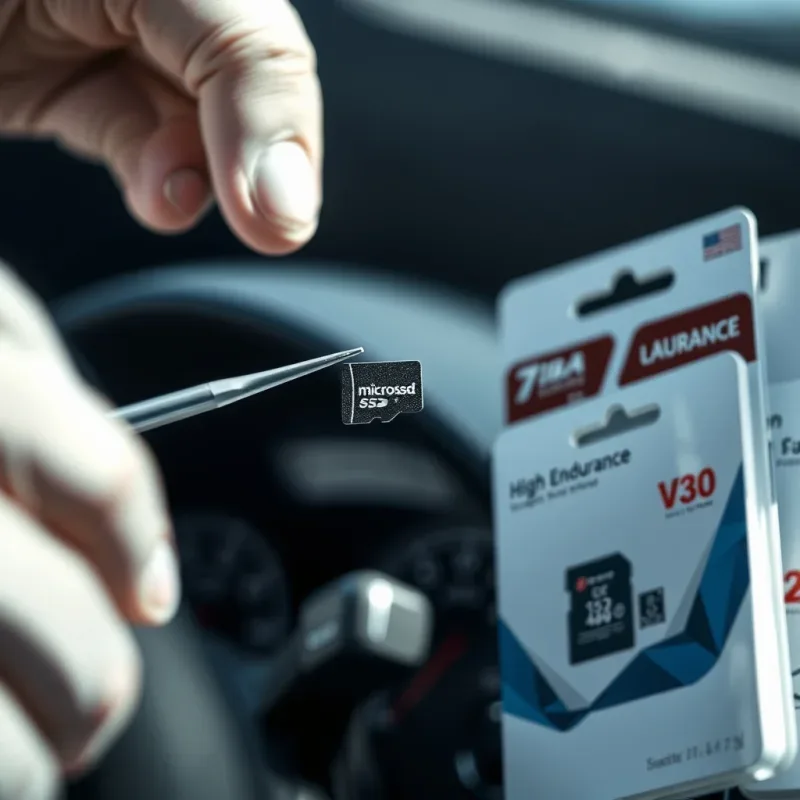
Step 1: Verify Endurance Ratings
Never buy a standard card for a dash cam. Look for terms like “High Endurance” or “Max Endurance” on the packaging. These cards use robust industrial-grade memory blocks designed to survive extreme heat inside a parked car and millions of data write cycles. Check the manufacturer warranty, as true high endurance cards often offer multi-year warranties specifically covering continuous video recording.
Step 2: Check Speed Classifications
Modern dash cams record in high definition, 2K, or 4K resolutions. This requires fast data transfer speeds to prevent buffering errors. Make sure your card displays the UHS Speed Class 3 (U3) symbol and the Video Speed Class 30 (V30) rating. These minimum speeds guarantee that the card can sustain the high bitrates required by dual-channel and 4K cameras without dropping frames.
Step 3: Determine the Correct Storage Capacity
Bigger is not always better if your dash cam has strict hardware limits. Check your camera manual to find the maximum storage size it supports, usually 128GB, 256GB, or 512GB. A 128GB or 256GB card provides a great balance. It gives you enough hours of loop history in case you miss noticing an event right away, while keeping file systems stable and fast.
Step 4: Avoid Counterfeit Cards
Counterfeit memory cards flood online marketplaces, offering huge capacities at very low prices. These fake cards have hacked controllers that report fake storage sizes, leading to immediate data loss when the real limit is reached. Always buy your memory cards from authorized local electronics retailers or direct factory stores to ensure you receive a genuine, safe product.
Best Practices for Maintenance and Safety
Once you install your new high endurance memory card, proper care keeps it working reliably for years. Always format the card directly inside the dash cam menu rather than on a computer. Computer operating systems format cards using file structures that dash cams struggle to read over time. Format the card every 30 days to clear out corrupted index files and ensure smooth loop recording.
Inspect your dash cam once a month by checking the recording indicator light. Never pull the memory card out of the camera while the vehicle engine is running or while the camera is actively saving an emergency file. Doing so can corrupt the file system instantly. If your car sits in direct summer sunlight for long periods, consider using a sunshade to lower cabin temperatures, which protects both the dash cam processor and the memory card from thermal damage.
Safety, Environmental Rules, and Pre-Checks
Working inside a vehicle or handling sensitive digital storage requires care. Before you touch your car or your storage media, you must check all safe conditions. Make sure the vehicle ignition is fully turned off.
Remove the keys from the ignition. This stops any electrical power from flowing to the camera or the accessory ports. Preventing unexpected power surges protects both your car’s electrical system and your data files.
Warning: Never insert or remove a memory card while the dash cam is turned on and recording. This action can instantly corrupt the file system and permanently destroy the card.
Park your vehicle in a well-ventilated area, such as an open garage or outdoors in the daylight. Good airflow keeps you safe from exhaust fumes if the engine is running, though you should keep the engine off during the installation process. Wear basic personal protective gear, such as safety glasses, if you are working near loose trim panels or sharp edges under the dashboard. Clean your hands before handling any electronic components to keep oils and dirt away from the metal pins.
When you finish your selection and testing process, dispose of any old or broken media safely. Do not throw old electronic storage cards into standard household trash. Take them to a local electronic waste recycling center. Many office supply stores and electronics retailers also offer free recycling drop-off boxes for old memory cards and small electronics.
Tools, Equipment, and Budget Alternatives
| Item / Tool | Purpose | Estimated Cost | Budget or Everyday Alternative |
|---|---|---|---|
| High Endurance MicroSD Card | Provides continuous loop recording and extreme heat resistance inside the vehicle. | $25 – $50 | Standard phone memory card (not recommended for long-term use). |
| USB Card Reader | Connects the micro storage card to a computer for formatting and testing. | $10 – $15 | Built-in laptop SD card slot with a microSD adapter sleeve. |
| Microfiber Cleaning Cloth | Wipes dust and fingerprints from the camera lens and card contacts. | $5 – $8 | Clean, lint-free cotton cloth. |
| Laptop or Desktop Computer | Runs speed tests and formats the storage card to the correct file system. | $300 – $800 | Public library computer or a friend’s computer. |
Workspace and Surface Preparation
Set up a clean, well-lit indoor workspace before you handle your dash cam equipment. A sturdy desk or table under a bright overhead light works best. Wipe the surface clean of dust, food crumbs, and moisture to prevent tiny particles from getting stuck inside the memory card slot or on the gold contact pins.
Good lighting helps you read the tiny text printed on the card and ensures you insert the media in the correct direction without forcing it. Keep your smartphone or computer nearby so you can quickly check camera compatibility lists and download formatting software if needed.
System Variations and Technical Requirements
Choosing the right card depends heavily on your specific camera setup and how hard the system works. Standard consumer memory cards are built for phones and cameras that take occasional photos. These cheap cards will quickly fail in a dash cam because a dash cam writes video data continuously, 24 hours a day.
For basic single-channel 1080p cameras, a standard High Endurance MicroSD Card is the baseline requirement. These cards use rugged MLC NAND Flash memory designed to handle thousands of hours of overwriting without breaking down.
If you use a modern multi-channel system that records front, rear, and cabin views in 4K resolution, your hardware demands are much higher. You must select a card that features UHS Speed Class 3 (U3) and Video Speed Class 30 (V30) ratings to guarantee fast, steady write speeds that prevent dropped frames. Furthermore, if your dash cam includes parking mode features or runs smart apps directly on the device, look for cards with an Application Performance Class 2 (A2) rating. This rating ensures the card can handle random read and write tasks quickly, keeping your protective parking sensors running smoothly in extreme heat and cold.
Understanding the Critical Role of Your Dash Cam Memory Card
A standard consumer memory card will quickly fail inside a vehicle. Dash cameras write video data continuously, hour after hour, under extreme temperature changes. Regular cards use TLC or QLC memory cells that wear out fast when subjected to endless read and write cycles. To protect your investment and ensure your footage is saved when you need it most, you must select a card specifically engineered for continuous video monitoring.
When shopping for a reliable card, you need to look for specific industry ratings. Always choose a card classified as a High Endurance MicroSD Card. These cards use robust MLC NAND Flash memory technology, which handles repetitive data erasure much better than standard consumer memory.
Furthermore, check the card specifications for a UHS Speed Class 3 (U3) rating and a Video Speed Class 30 (V30) rating. These ratings guarantee a minimum sustained write speed of 30 megabytes per second, which prevents dropped frames during high-definition recording. Finally, look for Application Performance Class 2 (A2) to ensure fast random read and write operations if your dash cam runs complex background tasks.
Step-by-Step Solutions: 3 Proven Methods to How to choose a dash cam memory card
Method 1: The Fast / Standard DIY Solution
Best for: Readers who want the quickest, most accessible standard approach using basic tools.
- Check your dash camera user manual or manufacturer website to find the maximum storage capacity supported, usually between 128GB and 512GB.
- Search online or visit a local electronics retailer specifically for a High Endurance MicroSD Card made by a reputable brand such as SanDisk, Samsung, or Kingston.
- Verify that the packaging clearly displays a UHS Speed Class 3 (U3) and Video Speed Class 30 (V30) rating to ensure it can handle 4K or 1080p continuous recording.
- Purchase a card with a storage capacity of at least 128GB (gigabytes) to provide roughly 8 to 12 hours of loop recording time before old files are overwritten.
- Insert the new card directly into your dash camera slot and use the camera menu to format the card before your first drive.
What Good Looks Like: The dash camera powers on, recognizes the new card without throwing a formatting error, and begins recording a stable loop.
Never rely on generic smartphone or gaming memory cards for dash camera use. Dash cams demand continuous write endurance. Using a standard card will void your warranty and lead to corrupted video files within three to six months due to extreme vehicle cabin heat and constant data overwrites.
Method 2: The In-Depth / Comprehensive Solution
Best for: Readers who want the most thorough, permanent, or complete restorative fix.
- Inspect your vehicle’s typical internal cabin temperatures, noting that summer dashboard temperatures can easily exceed 140 degrees Fahrenheit (60 degrees Celsius).
- Research and select an industrial-grade High Endurance MicroSD Card built specifically with MLC NAND Flash memory, which offers superior thermal tolerance and physical durability against extreme vibrations.
- Confirm that the card packaging or data sheet explicitly lists Application Performance Class 2 (A2) along with U3 and V30 ratings for optimal multitasking and rapid file indexing.
- Connect your computer to the internet and download official formatting software, such as the SD Association Memory Card Formatter, to prepare the drive properly.
- Insert the memory card into a quality USB card reader attached to your computer, open the formatting tool, and execute a full overwrite format to clear any factory anomalies.
- Eject the card safely from your computer, install it into your dash camera, and perform a stationary test recording for at least 15 to 20 minutes to verify complete stability.
What Good Looks Like: The computer formats the card completely without errors, and the dash camera records a seamless, uncorrupted video file during the test period.
Method 3: The Alternative / Budget / No-Specialty-Tool Workaround
Best for: Emergency situations, tight budgets, or when specialized tools are unavailable.
- Identify local big-box stores, office supply stores, or electronics retailers within a 5-mile (8-kilometer) radius that carry basic security camera accessories.
- Look specifically for security camera or surveillance-rated microSD cards on the shelf, as these are often identical in build quality to high endurance dash cam cards.
- Check the fine print on the back of the packaging to ensure it features at least a Class 10 speed rating and a V30 designation before taking it to the checkout counter.
- Insert the card directly into your dash camera and use the built-in formatting utility found in the camera settings menu to format the card on the spot.
What Good Looks Like: The camera successfully formats the budget card and records a test video without displaying a slow card warning message.
Diagnosing and Fixing Dash Cam Memory Card Failures
Your dash cam works in a harsh environment. It sits on a hot windshield, writing high-definition video data every second the car is moving. Standard memory cards will quickly fail under this constant stress.
When a card fails, your camera might stop recording without warning. You could lose critical video footage during an accident.
Fixing these issues requires looking at the symptoms, finding the root cause, and applying the right hardware solution. You must use a card built for endurance, such as a High Endurance MicroSD Card. These cards use special memory technology designed to handle endless write cycles without corrupting your data.
| Symptom / Warning Sign | Probable Root Cause | Immediate Corrective Fix |
|---|---|---|
| “Memory Error” or “Card Full” warning appears on screen shortly after formatting. | The file allocation table is corrupted due to low write endurance or counterfeit card capacity. | Back up important files immediately. Format the card inside the dash cam menu, not on a computer. If the error returns, replace the card with a genuine card featuring MLC NAND Flash memory. |
| Video playback stutters, drops frames, or shows green pixel blocks during playback. | The card write speed is too slow to keep up with high-bitrate dual or 4K recording. | Verify your card meets minimum speed standards. Ensure you are using a card rated at UHS Speed Class 3 (U3) and Video Speed Class 30 (V30) for uninterrupted 4K video writing. |
| Camera freezes, reboots randomly, or fails to wake up when the car engine starts. | Slow random read and write speeds causing the camera operating system to lag while managing background tasks. | Upgrade to a card with an Application Performance Class 2 (A2) rating. This ensures fast input/output operations per second (IOPS) so the camera can manage system files and video streams smoothly at the same time. |
| Camera stops recording loops and asks to format the card every single day. | The card has reached the end of its total Terabytes Written (TBW) lifespan, or the file system is permanently locked in read-only mode for self-protection. | Stop using the card immediately to prevent further data loss. Replace it with a new high-endurance card designed for continuous video surveillance. |
Costly Mistakes and Beginner Traps to Avoid

Choosing the wrong memory card is the number one reason dash cams fail. Many users try to save money by using old phone cards or cheap online deals. This often leads to lost video when you need it most. Review these common pitfalls to protect your investment and ensure your camera never misses a frame.
- Using Standard Consumer or Smartphone Cards: Standard cards are built for burst photos and occasional video playback, not 24/7 continuous writing. They wear out in months under dash cam heat and loops. Always buy a card specifically labeled for high endurance or continuous video monitoring.
- Buying Unverified Discount Cards Online: Third-party online marketplaces are flooded with fake cards that claim massive storage sizes at very low prices. These cards have hacked firmware that reports false capacities, which corrupts your video files. Purchase your storage from authorized local retailers or direct manufacturer stores.
- Ignoring Speed Class Requirements: Modern dash cams record in high definition, sometimes from multiple lenses at once. Using an old Class 10 or slow UHS-1 card causes buffer overflows and skipped frames. Match your camera’s bitrate requirements with cards that guarantee sustained high speeds.
- Never Formatting the Card in the Camera: Computers use different file allocation systems than dash cams. Formatting your card on a PC can cause severe cluster mismatches and write errors. Always use the built-in format tool inside your dash cam settings menu once a month to keep the file system clean.
- Leaving the Card in Extreme Heat Unattended: Leaving your camera parked in direct summer sun without a sunshade destroys cheap flash memory. High cabin temperatures accelerate card degradation. Park in the shade when possible and check your camera status light every time you drive.
Understanding Your Dash Cam Storage Needs Before You Buy
Choosing the right memory card for your dash cam is not like buying a standard card for a digital camera or a smartphone. Dash cams write data continuously, loop over old footage day after day, and often sit inside a hot vehicle parked in direct sunlight. Using a standard retail memory card will quickly lead to card failure, lost evidence, and frustration when you need the footage most.
Before making a purchase, you must understand the specific demands placed on modern dash cam storage. High-resolution recording in 4K or 1080p at 60 frames per second demands continuous, high-speed data transfer. Standard consumer cards are designed for burst photography or occasional video recording, meaning their internal controllers and memory cells degrade rapidly under the constant strain of loop recording.
To ensure reliability, you should look for specific industry ratings stamped on the card. A proper High Endurance MicroSD Card is engineered specifically to withstand thousands of hours of continuous writing and rewriting. Look for markings that indicate a minimum sustained write speed, such as UHS Speed Class 3 (U3) and Video Speed Class 30 (V30), which guarantee the card can handle high-bitrate video streams without dropping frames. Furthermore, if your dash cam runs background tasks, cloud features, or saves event clips directly to internal apps, selecting a card with an Application Performance Class 2 (A2) rating ensures fast random read and write operations.
The underlying memory technology also matters greatly. Consumer cards often use Triple-Level Cell (TLC) or Quad-Level Cell (QLC) NAND flash, which wears out faster. For maximum lifespan and reliability, seek out cards built with superior Multi-Level Cell (MLC) NAND Flash architecture, or specialized industrial-grade components designed to endure extreme temperatures and heavy write cycles.
DIY vs. Professional Service: Decision Guide & Cost Analysis
Selecting, installing, and maintaining a dash cam memory card is fundamentally a do-it-yourself task. However, understanding the boundaries between a simple DIY fix and when to seek technical support or hardware replacement will save you time, money, and potential equipment damage.
Safe DIY Thresholds
Selecting and replacing a dash cam memory card is an entirely safe, cost-effective, and practical task for any average vehicle owner. You do not need technical expertise or specialized tools to manage your device’s storage. Routine maintenance, such as formatting the card once a month through the dash cam menu, checking for firmware updates, and swapping out a degraded memory card, falls squarely within safe DIY thresholds.
Furthermore, reading error codes on the dash cam screen, such as “Memory Error” or “Format SD Card”, and performing surface-level troubleshooting (like removing the card and inserting it into a computer to recover files or reformat) carry zero risk to your vehicle’s electrical system. As long as you power off the dash cam before removing or inserting the card, you can safely manage your own storage needs.
When to Stop and Call a Professional
While handling the memory card is simple, there are critical boundaries where you must stop DIY efforts and seek professional help or hardware replacement. If your dash cam persistently rejects brand-new, high-quality memory cards, the issue is likely a failing internal card reader or a motherboard defect rather than the card itself. Forcing cards into a damaged slot can bend internal pins and short-circuit the device.
Do not attempt to solder, modify, or disassemble the dash cam casing to fix internal hardware faults. If your device is hardwired directly into the vehicle’s fuse box and begins experiencing power draws, electrical shorts, or blowing fuses whenever a memory card is inserted, stop immediately. Electrical system interference can damage your car’s computer or drain your battery. In these cases, consult a certified auto electrician or contact the dash cam manufacturer for a warranty replacement.
| Decision Factor | DIY Approach | Professional Service |
|---|---|---|
| Typical Time Required | 5 to 15 minutes | 1 to 2 hours (plus appointment time) |
| Estimated Cost Range (in USD) | $15 to $50 (cost of the memory card) | $75 to $150 (labor plus diagnostic fees) |
| Skill Level Required | Beginner (basic device handling) | Certified Automotive Technician |
| Equipment Needed | Compatible memory card, computer for formatting | Advanced diagnostic tools, multimeters |
| Risk Level | Very low (if device is powered off) | Very low (handled by trained professionals) |
Step-by-Step Implementation Guide for Selecting and Installing Your Card
Follow this sequential, safety-first process to choose, prepare, and install your new dash cam memory card correctly on the first attempt.
Step 1: Check Dash Cam Compatibility Specifications
Consult your dash cam user manual or manufacturer website to find the maximum storage capacity supported by the device. Many older models only support up to 32GB or 64GB, while modern 4K dash cams easily handle 128GB, 256GB, or even 512GB cards. Purchasing a card larger than your dash cam supports will result in read errors.
Step 2: Purchase the Correct Endurance-Rated Card
Buy a card explicitly marketed for surveillance or dash cam use. Ensure the card features a high endurance rating, along with a UHS Speed Class 3 (U3) and Video Speed Class 30 (V30) designation to guarantee smooth 4K or high-bitrate recording. Avoid generic or unbranded budget memory cards found on online marketplaces.
Step 3: Power Down the Vehicle and Dash Cam
Before touching the memory card slot, turn off your vehicle’s ignition and ensure the dash cam is completely powered down. Removing or inserting a memory card while the device is actively writing data can corrupt the file allocation table, rendering both the card and your recent video files useless.
Step 4: Format the Card Inside the Dash Cam
Insert the new memory card into the dash cam slot until it clicks into place. Power on the dash cam and navigate to the settings menu to locate the “Format” option. Always format the card directly within the dash cam rather than on a computer. This ensures the file system structure matches the exact requirements of your specific camera model.
Step 5: Perform a Test Recording and Verification
Drive around the block or trigger a manual emergency recording. Remove the card, insert it into a computer or check it via the dash cam playback mode to confirm that video files are saving correctly and that the loop-recording function operates without throwing warning messages.
Ongoing Maintenance and Long-Term Care
Maximizing the lifespan of your dash cam storage requires consistent, routine upkeep. Memory cards used in dash cams undergo extreme stress due to the continuous cycle of writing and erasing data. To prevent unexpected failures during a critical incident, establish a strict maintenance schedule.
Format your dash cam memory card directly inside the device once every month. Over time, fragmented data and locked emergency files can clog the storage allocation, leading to write errors or slowed performance. Formatting clears the directory completely and restores optimal write speeds.
Inspect the memory card every six months for physical wear, heat distortion, or discoloration caused by prolonged cabin heat. Even the highest quality cards have a finite number of write cycles. If your dash cam begins to prompt you with unexpected formatting errors or fails to save footage, replace the card immediately to maintain reliable vehicle surveillance.
Frequently Asked Questions
Can I use a standard phone micro SD card in my dash cam?
No, you should never use a standard phone memory card in a dash cam. Standard cards are designed for occasional reading and writing, whereas dash cams continuously overwrite video data 24/7. Using the wrong card will lead to rapid card failure and data corruption. Always choose a specialized High Endurance MicroSD Card built for continuous video streams.
What does V30 mean on a memory card label?
V30 stands for Video Speed Class 30, which guarantees a sustained write speed of at least 30 megabytes per second. This speed rating is the baseline requirement for recording smooth High Definition or 4K video without dropping frames. Look for UHS Speed Class 3 (U3) and Video Speed Class 30 (V30) ratings to ensure your camera captures every critical detail on the road.
Why do dash cams require MLC NAND Flash memory?
MLC NAND Flash stores multiple bits of data per memory cell while maintaining superior durability compared to cheaper consumer flash types. This technology handles the extreme read and write cycles of constant loop recording without wearing out prematurely. Selecting a card with high-grade flash memory protects your investment and ensures reliable performance in harsh vehicle environments.
How often should I format my dash cam memory card?
You should format your memory card directly inside the dash cam once every month. Formatting clears out fragmented data and keeps the file allocation table clean, preventing write errors that can corrupt your footage. Always back up any important clips to your computer before running the format process.
What storage capacity is best for a dash cam?
A 128GB or 256GB card is the sweet spot for most modern dash cams. This size provides enough hours of loop recording space before older files get overwritten without overwhelming the camera’s processing system. Check your specific dash cam manufacturer manual, as some models have a maximum storage capacity limit they can support.
Do I need an A2 rating for a dash cam memory card?
While Application Performance Class 2 (A2) ratings are primarily designed for running mobile apps quickly on smartphones and tablets, they also benefit modern dash cams. An A2 rating ensures high random input and output operations per second, which helps the camera quickly load settings and handle complex multi-channel data streams smoothly.
Preventative Care & Long-Term Maintenance Schedule
- Weekly Quick Check: Visually inspect the dash cam status light to confirm it is actively recording. Ensure the memory card is securely seated in the slot and the unit is not overheating on your windshield.
- Monthly Data Maintenance: Remove the memory card and format it using the built-in formatting tool on your dash cam. Never format the card on a computer using arbitrary file systems, as this can cause compatibility errors.
- Seasonal Health Audit: Test the playback of recent video files on a computer every three months. Check for stuttering, corrupted files, or missing segments to catch card degradation before a critical incident occurs.
- Annual Replacement Protocol: Replace your dash cam memory card every 12 to 18 months depending on your driving habits. Continuous loop writing eventually exhausts the lifespan of even the highest quality flash memory.
Take action right now by checking your current dash cam memory card packaging or settings to verify its endurance rating and storage capacity. If your card lacks the proper video speed ratings or is more than a year old, order a reliable high endurance replacement immediately to ensure your vehicle is always protected.


