Learn how dash cams work, what to look for, how to install them safely, and troubleshoot common problems. Step-by-step guide for car owners with all skill levels.
A dash cam is a small video camera that mounts to your windshield or dashboard. It records everything that happens in front of your car while you drive. Some models also record the inside of the car or the rear view.
Dash cams matter for several important reasons. They record accidents so you have proof of what happened. They protect you from false insurance claims. They capture hit-and-run drivers and license plates. They can record dangerous driving by others. Some insurance companies offer discounts when you use a dash cam.
In this guide, you will learn exactly how dash cams work. You will understand the main parts and features. You will learn how to choose the right model for your needs. You will get clear instructions for installing a dash cam using different methods. You will learn how to fix common problems. You will know when to do it yourself and when to hire a professional.
Safety and Precautions
Before you begin working with dash cams, follow these safety rules:
Windshield and Vision Safety
- Never mount a dash cam where it blocks your view of the road
- Check your local laws about windshield obstructions
- Most regions allow devices in a small area near the rearview mirror
- Keep the camera behind the rearview mirror when possible
- Do not place the camera in the driver’s direct line of sight
Electrical Safety
- Disconnect the power before hardwiring any dash cam
- Do not tap into airbag circuits or critical safety systems
- Use proper fuse taps rated for your vehicle’s electrical system
- Avoid routing wires near hot engine parts or moving components
- Do not overload your vehicle’s power outlets
ADAS and Sensor Considerations
- Modern cars have cameras and sensors in the windshield area
- Check your owner’s manual for sensor locations
- Do not cover or interfere with lane departure sensors
- Do not block rain sensors or automatic high beam sensors
- Maintain proper clearance around factory camera systems
General Precautions
- Work in a well-lit area where you can see clearly
- Do not force wiring into tight spaces
- Protect interior trim pieces from scratches during installation
- Keep small parts away from children and pets
- Dispose of packaging materials properly
How Dash Cams Work: Main Components and Functions

A dash cam has several key parts that work together:
Camera Lens and Image Sensor
The lens captures light from the road ahead. The image sensor converts this light into digital video. Better sensors produce clearer images in low light. Wide-angle lenses capture more of the road and surrounding area. Most dash cams use lenses between 120 and 170 degrees of view.
Processor and Memory
The processor compresses the video and saves it to a memory card. The dash cam records in loops. When the memory card fills up, the camera deletes the oldest files and records new ones. Most models use microSD cards from 32 GB to 256 GB in size.
G-Sensor (Accelerometer)
This sensor detects sudden movements like hard braking or impacts. When it detects a collision, it locks the current video file. Locked files do not get deleted during loop recording. This protects important accident footage.
GPS Module
Some dash cams include GPS. This records your location, speed, and route. The GPS data saves with the video file. You can view your location on a map when you play back the footage.
Power System
Most dash cams plug into your car’s 12V power outlet (cigarette lighter). Some models hardwire to your fuse box for cleaner installation. Many include a small battery or capacitor. This allows the camera to save the current file if power suddenly stops.
Parking Mode
Advanced dash cams can record when your car is parked and the engine is off. They use motion detection or G-sensor triggers. They record only when something happens near your vehicle. This requires a hardwire installation or external battery pack.
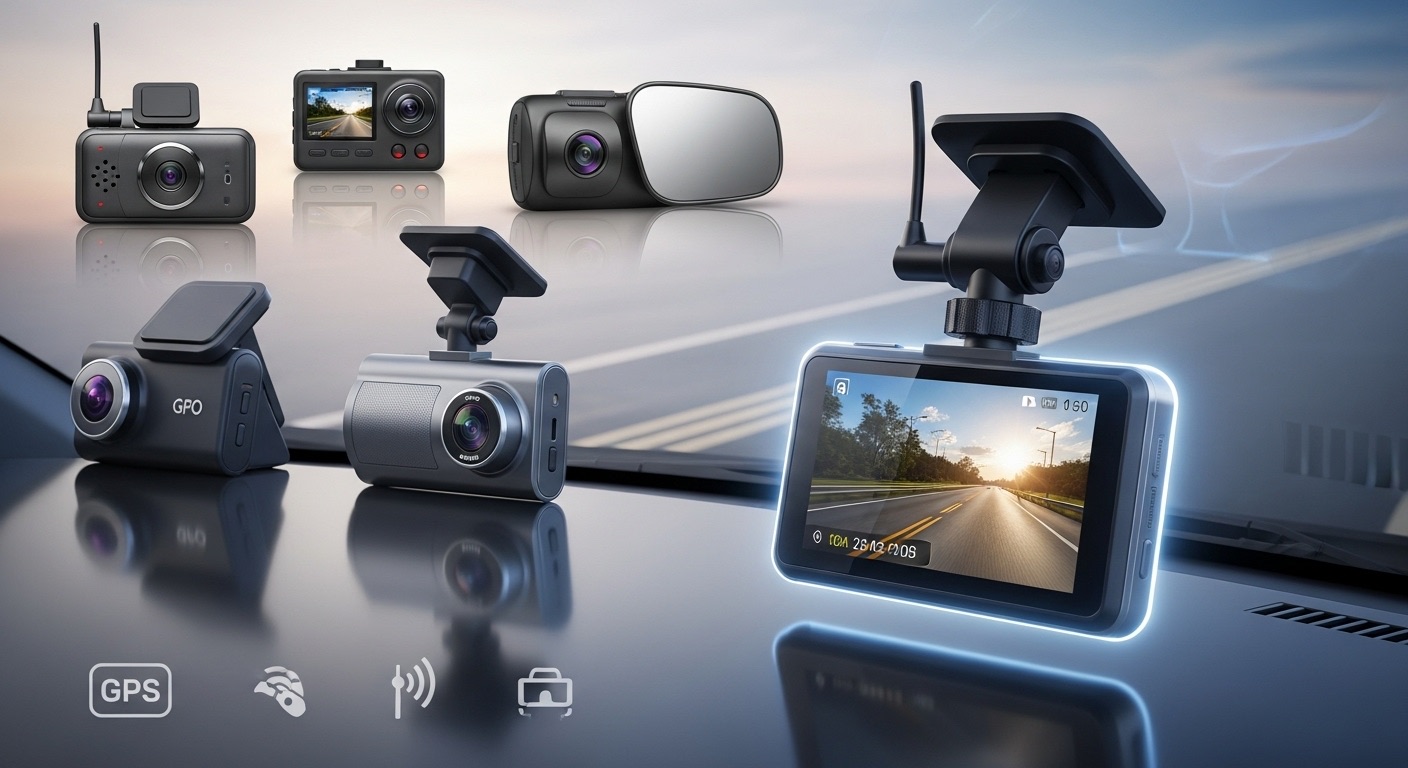
Types of Dash Cams and Assessment

Choose the right type based on your needs and budget:
Single-Lens Front Camera
- Records only the road ahead
- Simplest to install
- Lowest cost option
- Good for basic accident protection
- Best for: Budget buyers, first-time users
Dual-Channel Camera (Front and Rear)
- Records both front and rear views
- Protects against rear-end collisions
- More complex installation
- Requires running cable to rear window
- Best for: Complete protection, rideshare drivers
Interior Camera
- Records inside the vehicle
- Some models combine interior and front views
- Good for rideshare and taxi drivers
- Includes infrared for night recording
- Best for: Professional drivers, parents monitoring teen drivers
Mirror Dash Cam
- Replaces or covers your rearview mirror
- Built-in display screen
- Often includes rear camera
- Cleaner look than separate devices
- Best for: Those who want hidden installation
Assess Your Needs:
Ask yourself these questions:
- Do you want front recording only or front and rear?
- Do you need parking mode recording?
- Is GPS tracking important to you?
- What is your budget?
- Do you want to see footage on the camera or on your phone?
- Will you install it yourself or hire a professional?
DIY vs Professional Installation Thresholds:
You can install yourself if:
- You use the power outlet for power
- You mount only a front camera
- You are comfortable hiding cables in trim panels
- Your vehicle does not have complex sensors near the mirror
Seek professional help if:
- You want hardwire installation to the fuse box
- Your windshield has multiple sensors and cameras
- You need parking mode with battery protection
- You drive a newer vehicle with ADAS systems
- You want rear camera installation with clean wiring
Tools and Materials
| Item | Purpose | Estimated Cost | Alternatives |
|---|---|---|---|
| Dash cam unit | Records video footage | 50–50–400 | N/A – main component |
| MicroSD card (Class 10 or higher) | Stores video files | 15–15–50 | N/A – required |
| Microfiber cloth | Cleans windshield surface | 3–3–8 | Clean cotton cloth |
| Isopropyl alcohol (70% or higher) | Removes oils and residue | 3–3–6 | Glass cleaner |
| Plastic trim tools | Removes panels without damage | 8–8–15 | Credit card (careful use) |
| Cable clips or adhesive mounts | Secures power cable | 5–5–12 | Tape (temporary) |
| Fuse tap kit (for hardwiring) | Connects to vehicle fuse box | 10–10–20 | N/A – for hardwire only |
| Multimeter (for hardwiring) | Tests circuits and voltage | 15–15–40 | Test light (8–8–15) |
| Wire strippers (for hardwiring) | Prepares wires for connection | 8–8–20 | Sharp knife (not recommended) |
| Zip ties | Organizes excess cable | 4–4–8 | Twist ties |
Where to Buy:
Auto parts stores (AutoZone, O’Reilly, Advance Auto Parts), electronics stores (Best Buy), online retailers (Amazon, manufacturer websites), big-box stores (Walmart, Target).
Preparation
Choose Your Workspace
Park your vehicle in a safe location with good lighting. A garage or covered area works best. Make sure you can open all doors fully. You need access to both the interior and possibly the hood (for hardwiring).
Temperature Considerations
Install dash cams when the temperature is between 50°F and 85°F (10°C and 30°C). Adhesive mounts stick better in moderate temperatures. Very cold or very hot glass affects adhesive performance.
Clean the Mounting Area
The windshield must be completely clean for good adhesion.
- Spray glass cleaner or isopropyl alcohol on the mounting spot
- Wipe with a clean microfiber cloth
- Dry completely
- Check for any residue or film
- Clean again if needed
- Wait 5 minutes for the surface to dry fully
Plan Your Cable Route
Before you mount the camera, plan where the power cable will go. The cable should:
- Run along the top of the windshield
- Tuck into the headliner gap
- Run down the A-pillar (the side post between windshield and door)
- Continue along the side of the dashboard or under floor trim
- Reach the power outlet or fuse box
Look at your specific vehicle and identify these paths before you start.
Test the Dash Cam First
Before permanent installation:
- Insert the microSD card
- Plug the power cable into the camera
- Plug the other end into your power outlet
- Turn on the ignition
- Wait for the camera to start
- Check that recording begins
- Verify the image is clear
- Check the viewing angle by holding the camera near the final position
This confirms everything works before you commit to mounting.
Step-by-Step Installation Methods

Method 1: Basic Power Outlet Installation (Front Camera Only)
When to Use:
This method works for most single-lens dash cams. It is the easiest and fastest option. No electrical knowledge needed. You can reverse the installation easily.
Time Required: 20 to 40 minutes
Steps:
- Position the camera on the windshield
- Hold the camera behind the rearview mirror
- The lens should point straight ahead
- Make sure the view is level
- Mark the position with a small piece of tape
- Clean the mounting area
- Use isopropyl alcohol on a microfiber cloth
- Wipe the area thoroughly
- Let it dry for 5 minutes
- Attach the mount
- Remove the protective film from the adhesive pad
- Press the mount firmly against the glass
- Hold steady pressure for 30 seconds
- Wait 15 minutes before attaching the camera
Note: Some mounts use suction cups instead of adhesive. For suction mounts, clean the glass and press firmly until the suction holds.
- Attach the camera to the mount
- Slide or clip the camera onto the mount bracket
- Tighten any adjustment screws
- Make sure the camera is level
- Route the power cable
- Start at the camera
- Tuck the cable into the gap between headliner and windshield
- Use a plastic trim tool or your fingers
- Work the cable toward the side of the windshield
- Route it down the A-pillar trim
- Remove the A-pillar trim
- Gently pull the A-pillar cover away from the body
- It usually has plastic clips
- Pull from the top and work down
- Tuck the cable behind this trim piece
- Press the trim back into place
- Route cable to power outlet
- Run the cable under the edge of the dashboard
- Or route it along the door seal
- Use cable clips every 12 inches (30 cm) to secure
- Leave enough slack at both ends
- Connect the power
- Plug the cable into your 12V outlet
- Turn on the ignition
- The camera should power on automatically
- Adjust the camera angle
- Check the camera screen or app
- Adjust up or down until the horizon is level
- The road should fill the bottom two-thirds of the view
- The sky should fill the top one-third
- Secure excess cable
- Coil any extra cable neatly
- Use zip ties or cable clips
- Tuck the coil out of sight under the dashboard
- Make sure it does not interfere with pedals
Quality Check:
- View the live image on the camera screen or app
- Drive around the block and review footage
- Check that recording starts automatically when you start the car
- Verify the camera has a clear, unobstructed view
- Confirm the mount holds steady without shaking
Method 2: Hardwire Installation with Fuse Box Connection
When to Use:
Use this method when you want a cleaner look without cables hanging down. This method is required for parking mode. It provides constant power even when the car is off. This requires basic electrical skills.
Time Required: 60 to 90 minutes
Caution: Working with your vehicle’s electrical system requires care. Incorrect connections can blow fuses or damage electronics. If you are not comfortable with electrical work, hire a professional.
Steps:
- Complete steps 1-6 from Method 1 (position camera, mount, route cable to A-pillar)
- Purchase the correct hardwire kit
- Get a kit designed for dash cams
- It should include a fuse tap and voltage protection
- Many kits have three wires: red (constant power), yellow (ignition-switched power), black (ground)
- Locate your fuse box
- Most vehicles have the main fuse box under the dashboard on the driver’s side
- Check your owner’s manual for the exact location
- Some vehicles have fuse boxes under the hood
- Identify power sources
- You need one constant power fuse and one ignition-switched fuse
- Use your owner’s manual to identify fuses
- Constant power examples: clock, radio memory, dome light
- Ignition-switched examples: radio power, accessories, windshield wipers
- Choose circuits rated at least 5A higher than the fuse you will add
- Test the fuse circuits
- Set your multimeter to DC voltage
- Turn off the ignition
- Touch the red probe to the fuse metal contact
- Touch the black probe to a metal ground
- Note which fuses have 12V with the ignition off (constant)
- Turn on the ignition
- Note which fuses have 12V only with ignition on (switched)
- Install the fuse tap
- Remove the chosen fuse from the fuse box
- Insert the original fuse into the fuse tap adapter
- Insert a new fuse of the same rating into the other slot of the fuse tap
- Push the fuse tap back into the fuse box slot
- Connect the hardwire kit
- Connect the red wire to the constant power fuse tap
- Connect the yellow wire to the ignition-switched fuse tap
- Find a grounding point (metal bolt or screw attached to the body)
- Scrape away any paint if needed for good metal contact
- Attach the black ground wire securely
- Connect to the dash cam
- Route the hardwire kit cable up through the A-pillar
- Connect it to the dash cam power input
- Turn on the ignition
- Verify the camera powers on
- Configure parking mode (if applicable)
- Enter the camera settings menu
- Enable parking mode
- Set the voltage cutoff (usually 11.8V for 12V systems)
- This prevents the camera from draining your battery completely
- Set motion sensitivity if available
- Test all functions
- Test normal recording with ignition on
- Test parking mode with ignition off
- Verify the camera shuts down at the voltage cutoff
- Check that files save correctly
Quality Check:
- Camera turns on with the ignition
- Recording starts automatically
- Parking mode activates when ignition is off
- Camera stops before draining battery too low
- All wires are hidden and secure
- No fuses are blown
Method 3: Dual-Camera Installation (Front and Rear)
When to Use:
Use this method when you want protection for both the front and rear of your vehicle. This installation is more complex because you must run a cable from front to rear.
Time Required: 90 to 120 minutes
Steps:
- Complete Method 1 or Method 2 for the front camera
- Plan the rear camera location
- The rear camera usually mounts to the rear windshield
- Position it centered and high for the best view
- Or mount it near the rear license plate on some systems
- Clean the rear mounting area
- Follow the same cleaning process as the front camera
- Mount the rear camera
- Attach the mount to the cleaned glass
- Wait 15 minutes for adhesive to set
- Attach the camera to the mount
- Route the rear camera cable
- Start at the front camera location
- Run the cable along the headliner on one side
- Tuck it into the gap between headliner and roof
- Work toward the rear of the vehicle
- On SUVs and hatchbacks, route down the C-pillar or D-pillar
- On sedans, route through the trunk access
- Access the trunk or cargo area
- Remove the rubber seal between body and trunk opening
- Feed the cable through this passage
- Replace the seal carefully
- Route cable to rear camera
- Run the cable along the rear pillar trim
- Remove trim panels if needed using plastic tools
- Connect to the rear camera
- Secure all cables
- Use cable clips every 12 inches (30 cm)
- Make sure cables do not interfere with seatbelts
- Keep cables away from moving parts
- Tuck excess cable length neatly
- Test both cameras
- Power on the system
- Check both front and rear views
- Adjust angles as needed
- Record test footage
- Review playback of both camera feeds
Quality Check:
- Both cameras record simultaneously
- Both views are clear and properly aimed
- Cables are hidden and secure
- No interference with vehicle functions
- Split-screen or picture-in-picture works (if supported)
Post-Installation Checks and Settings

After installation, configure your dash cam for best performance:
Basic Settings:
- Set the date and time
- This stamps all recordings
- Important for evidence value
- Choose video resolution
- Higher resolution (1080p or 4K) gives clearer images
- Higher resolution uses more storage space
- 1080p is a good balance for most users
- Set loop recording length
- Choose 1, 3, or 5-minute segments
- Shorter segments mean more files
- 3 minutes is a good standard setting
- Adjust G-sensor sensitivity
- High sensitivity locks files more often
- Low sensitivity might miss important events
- Medium is recommended to start
- Adjust based on your driving conditions
- Enable audio recording
- Records sound inside the vehicle
- Can be evidence but also records your conversations
- Choose based on your preference
- Test the system
- Drive around your neighborhood
- Create several short trips
- Review the recorded footage on a computer
- Check video quality, audio quality, and file timestamps
- Verify that loop recording deletes old files
Curing and Settling Time:
Allow 24 hours for adhesive mounts to reach full strength. Do not wash your car or expose it to extreme temperatures during this time. Avoid adjusting the camera position after mounting.
Troubleshooting Common Dash Cam Problems
| Problem | Likely Cause | Fix |
|---|---|---|
| Camera does not turn on | No power connection | Check power cable plugged in fully; test power outlet with another device; check fuse if hardwired |
| Recording stops randomly | Memory card full or faulty | Format the card in the camera; use high-endurance microSD card; replace card if old |
| Blurry video | Dirty lens or wrong focus | Clean lens with microfiber cloth; remove protective film if still on lens; check focus setting |
| Night video is too dark | Camera positioned incorrectly | Clean windshield inside; disable WDR if too dark; adjust exposure in settings |
| Windshield glare in video | Dashboard reflection | Use a polarizing filter if camera supports it; cover dashboard with dark cloth; reposition camera angle slightly down |
| Files will not play on computer | Wrong codec or corrupt file | Update camera firmware; use VLC media player; try different card reader; format card and test again |
| GPS location is wrong | Poor GPS signal | Allow 5 minutes for GPS lock; update GPS firmware; park outside with clear sky view; check GPS antenna connection |
| Camera keeps beeping | Various warning sounds | Check camera manual for beep meanings; usually low storage, no SD card, or high temperature warning |
| Mount keeps falling off | Poor adhesive bond or hot weather | Clean windshield thoroughly with alcohol; install in moderate temperature; wait full 24 hours before use; consider suction mount |
| Parking mode drains battery | Voltage cutoff set too low | Raise cutoff to 12.2V; reduce parking mode time limit; install battery protection module; check alternator charging |
| Camera overheats and shuts down | Direct sun exposure | Reposition out of direct sunlight; use heat-resistant mount; install sun shield on windshield; check if camera has heat issues (may need replacement) |
| Date and time keep resetting | Internal battery dead | Replace capacitor or battery (professional service); set time before each drive temporarily |
Maintenance and Prevention
Regular Care Schedule:
Weekly:
- Clean the camera lens with a microfiber cloth
- Check that the camera is still recording properly
- Verify the mount is secure
Monthly:
- Review several saved video files to check quality
- Delete locked files you no longer need
- Clean the windshield inside and outside
- Check cable connections are still tight
Every 3 Months:
- Format the microSD card in the camera (backs up important files first)
- Update camera firmware if available
- Check all cable routing is still secure
- Verify G-sensor is working (test by tapping camera)
Every 6 Months:
- Inspect the power cable for wear or damage
- Check the adhesive mount for weakening
- Clean the rear camera if installed
- Review and adjust settings if needed
Yearly:
- Consider replacing the microSD card (they wear out over time)
- Check manufacturer website for firmware updates
- Inspect hardwire connections if installed
- Test parking mode function
Protective Measures:
Use a high-endurance microSD card designed for continuous recording. Regular cards wear out faster.
Park in shade when possible. Extreme heat shortens camera life and can loosen adhesive mounts.
Use a windshield sun shade in hot climates. This keeps the interior cooler and protects the camera.
Turn off the camera when using car washes. High-pressure water can damage connections.
Keep a backup of important footage. Memory cards can fail without warning.
When Not to DIY and When to Seek Professional Help
Seek professional installation if:
- Your vehicle has ADAS systems with windshield cameras or sensors
- You are not comfortable working with electrical systems
- You want hardwire installation but have no electrical experience
- Your vehicle is under warranty and you want to avoid any risk
- You need parking mode with complex power management
- You drive a luxury vehicle with sensitive electronics
- The fuse box location is difficult to access
- You want rear camera installation but cannot route cables yourself
Professional Installation Costs:
- Basic front camera: $50 to $100
- Hardwire installation: $75 to $150
- Dual-camera system: $125 to $250
- Complex installation with parking mode: $150 to $300
Professional Installation Time:
- Basic installation: 30 to 60 minutes
- Hardwire installation: 1 to 2 hours
- Dual-camera system: 1.5 to 3 hours
When to Replace Instead of Repair:
Replace your dash cam if:
- The image sensor fails or produces distorted images
- The camera will not power on after troubleshooting
- The camera overheats constantly
- The memory card slot is damaged
- The cost to repair exceeds 60% of a new camera price
Modern dash cams typically last 2 to 5 years depending on quality and conditions.
Related Electrical Concerns
Just like dash cam installation requires understanding your vehicle’s electrical system, maintaining battery health is equally important. Hardwire installations and parking mode features draw power constantly. If your battery shows signs of weakness after installation, you need the right equipment to address it. Check our complete Jump Starter vs Battery Charger: Expert Comparison to learn which device protects your investment and keeps you on the road.
Time, Cost, Skill, and Risk Summary
Estimated Total Time:
- Power outlet installation (front only): 20 to 40 minutes
- Hardwire installation: 60 to 90 minutes
- Dual-camera installation: 90 to 120 minutes
Approximate DIY Cost Range:
- Budget dash cam: $50 to $100
- Mid-range dash cam: $100 to $200
- Premium dash cam with GPS: $200 to $400
- MicroSD card: $15 to $50
- Installation supplies: $10 to $30
- Hardwire kit (if needed): $10 to $20
- Total DIY cost: $85 to $500 depending on camera choice and method
Skill Level:
- Power outlet installation: Beginner
- Hardwire installation: Intermediate
- Dual-camera installation: Intermediate
Risk Level:
- Power outlet installation: Low (easily reversible)
- Hardwire installation: Medium (electrical risk if done incorrectly)
- Dual-camera installation: Medium (more complex routing, more time investment)
Common Mistakes to Avoid

Installation Errors:
- Mounting the camera where it blocks your view of the road or obstructs sensors
- Not cleaning the windshield properly before mounting (leads to falling mount)
- Installing in extreme hot or cold temperatures (adhesive will not bond well)
- Routing cables where they interfere with airbags or safety systems
- Leaving cables visible and messy instead of hiding them properly
- Overtightening trim panels when reinstalling them (can crack plastic)
Electrical Mistakes:
- Tapping into airbag or critical safety system circuits for power
- Using the wrong amperage fuse for hardwire installation
- Not setting a voltage cutoff for parking mode (drains battery dead)
- Connecting hardwire kit wires backwards (can damage camera)
- Not securing ground wire to clean bare metal (poor connection)
Operation Mistakes:
- Using a low-quality or slow microSD card (causes recording errors)
- Never formatting the memory card (leads to file corruption)
- Setting loop recording segments too long (large files, fewer backup points)
- Keeping too many locked files (fills card, stops recording)
- Not updating firmware when improvements are available
- Forgetting to check that recording actually started
Maintenance Mistakes:
- Letting the lens get dirty (poor image quality)
- Ignoring camera overheating warnings (can cause permanent damage)
- Using glass cleaner with ammonia on the lens (damages coatings)
- Leaving the camera in the car in extreme heat for long periods
- Not backing up important footage before formatting card
Frequently Asked Questions
Do I need a dash cam if I have good insurance?
Yes, a dash cam provides evidence that helps settle claims faster. Insurance covers costs, but a dash cam proves fault. This can prevent your rates from increasing. It also protects you against fraud and hit-and-run incidents.
Will a dash cam drain my car battery?
If you use a power outlet installation, the camera only runs when the ignition is on. It will not drain your battery. Hardwire installations with parking mode can drain the battery if not set up correctly. Use a voltage cutoff feature to prevent this. Set the cutoff to 11.8V or 12.2V for 12V systems.
Can I use any microSD card in my dash cam?
No. Use only high-endurance or dash cam specific cards. Regular cards fail quickly with continuous recording. Choose Class 10, U3, or V30 rated cards. Brands like Samsung, SanDisk, and Lexar make high-endurance models specifically for this use.
How long does video footage stay on the card?
This depends on card size, video resolution, and loop recording length. A 64 GB card typically stores 6 to 10 hours of 1080p footage. When the card fills up, the oldest unlocked files are automatically deleted. Locked files from incidents remain until you manually delete them.
Is it legal to have a dash cam in all states?
Dash cams are legal throughout the United States. However, windshield obstruction laws vary by state. Most states allow devices in a small area near the rearview mirror. Some states restrict the size or placement. Check your local regulations. Audio recording laws also vary. Some states require consent from all parties before recording conversations.
Will a dash cam work in extreme heat or cold?
Most dash cams are rated for -4°F to 140°F (-20°C to 60°C). However, performance may suffer at extremes. Use a capacitor-based camera instead of battery-based in very hot climates. Batteries can swell and fail in heat. In very cold weather, the camera may take longer to start.
Can I view dash cam footage on my phone?
Many modern dash cams include WiFi. You can connect your phone to the camera and view footage through an app. Some cameras also have Bluetooth. This is useful for quick review without removing the memory card. Check if your camera model supports this feature.
Summary and Key Takeaways
Dash cams are valuable devices that protect you by recording video evidence while you drive. They work by using an image sensor and processor to capture and save continuous loop recordings to a memory card. Key features include G-sensors for incident detection, GPS for location tracking, and parking mode for recording when the vehicle is off.
Installing a dash cam yourself is possible with basic tools and patience. Power outlet installations are simple and perfect for beginners. Hardwire installations provide cleaner results and enable parking mode but require electrical knowledge. Dual-camera systems offer complete protection but take more time to install.
Proper installation means choosing the right mounting location, cleaning the surface thoroughly, routing cables neatly, and configuring the camera settings correctly. Regular maintenance includes cleaning the lens, formatting the memory card, and checking connections.
Take Action Now:
- Decide which type of dash cam meets your needs and budget
- Gather the necessary tools and materials
- Choose your installation method based on your skill level
- Follow the step-by-step instructions carefully
- Test the system thoroughly after installation
- Set up a maintenance schedule
If you are uncertain about hardwiring or have a vehicle with advanced driver assistance systems, consult a professional installer. The cost is reasonable and ensures safe installation without risking your vehicle’s electrical system.
Start protecting yourself today with a properly installed and maintained dash cam.


