
 By
ByTo test a car battery with a multimeter, set the meter to 20V DC. Touch the red probe to the positive terminal and the black probe to the negative terminal with the engine off. A healthy battery reads 12.6 volts or higher; readings below 12.2 volts indicate a discharged or failing unit.
- A fully charged 12-volt car battery must read between 12.6V and 12.8V at rest.
- Resting voltage below 12.2V means the battery is down to roughly 50% capacity and needs immediate charging.
- A resting test reveals state-of-charge, but cranking voltage benchmarks confirm whether the battery can actually start your engine.
- Accurate diagnostic tools require proper DC calibration to match OEM product specifications.
Understanding Automotive Voltage and Battery Health
Learning how to test a car battery with a multimeter gives you an instant window into your vehicle’s electrical health. A standard automotive battery relies on six internal lead-acid cells connected in series, each producing approximately 2.1 volts. When chemical energy converts into electrical energy, minor drops in surface charge can signal deeper issues like plate sulfation or acid stratification. Regular performance benchmarking helps you spot degradation before you end up stranded in an empty parking lot.
Electrical diagnostics also safeguard other expensive vehicle components. When a battery loses efficiency, your vehicle’s alternator works overtime to compensate, generating excessive heat that shortens its lifespan. While many drivers browse an Amazon affiliate review to find budget meters, understanding basic measurements matters more than buying high-end gear. Verifying that your battery holds current according to original product specifications preserves overall build quality and durability across your starting and charging systems.
12.6V to 12.8V (Resting Voltage)
The battery is fully charged (100% state of charge). The chemical plates are clean, and internal resistance remains minimal. The electrical system operates within ideal manufacturer parameters.
12.0V to 12.4V (Low Charge / Sulfation)
The battery holds between 25% and 75% capacity. Sluggish morning starts may occur. Permanent lead sulfate crystals will begin hardening on the plates if left undercharged.
Below 11.9V Resting (or Under 9.6V Cranking)
The battery is severely discharged, has a dead cell, or suffers an internal short circuit. It lacks the cold cranking amps required to run modern vehicle electronics and fuel pumps.
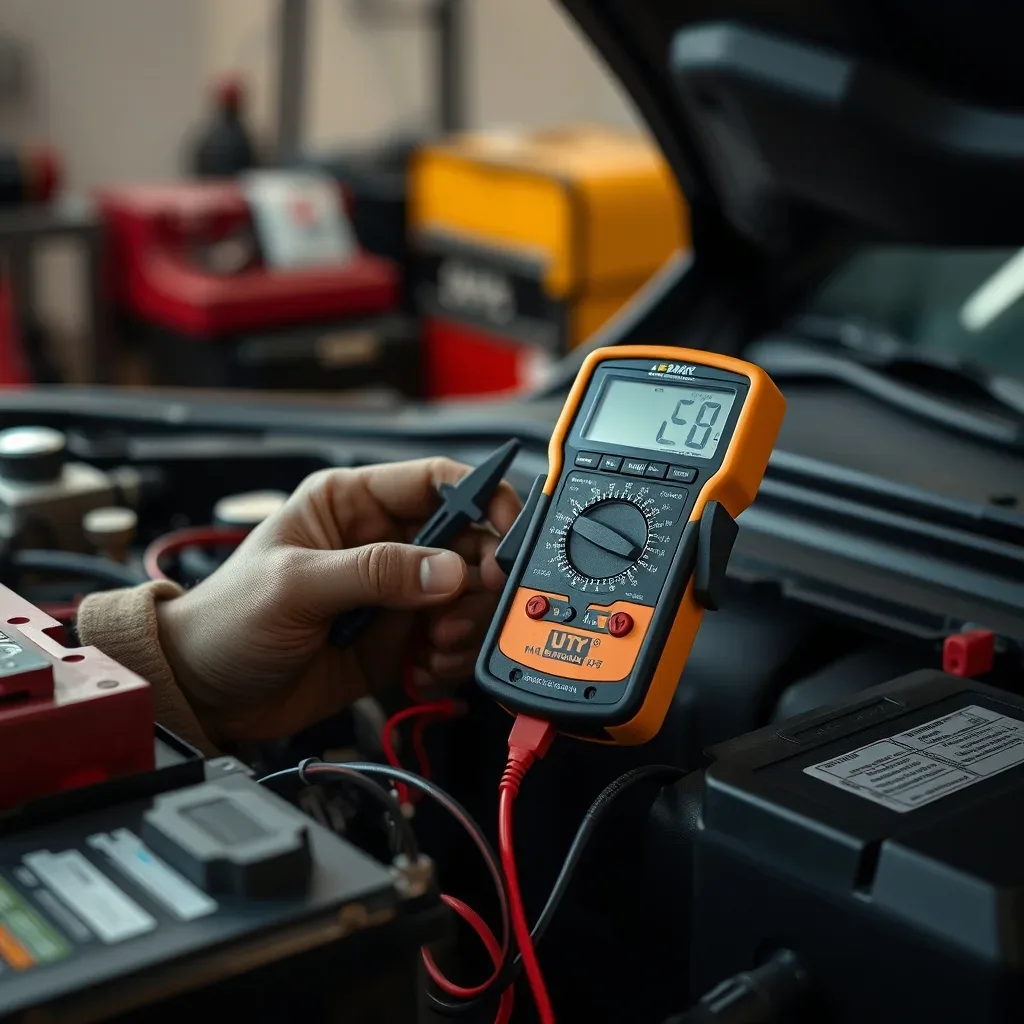
Essential Preparation, Safety Boundaries, and Equipment Requirements
Working around an automotive electrical system requires respect for both chemical and electrical hazards. A standard lead-acid car battery contains sulfuric acid and emits volatile hydrogen gas during normal charge and discharge cycles. Before learning how to test a car battery with a multimeter, park the vehicle on a level surface, set the emergency brake, and turn the engine off completely.
Remove ignition keys from the vehicle to ensure auxiliary circuits remain inactive. Always remove metal jewelry, rings, and wristwatches, as accidental contact between a positive terminal and the vehicle chassis creates a direct short circuit capable of causing severe burns or battery explosion. Equip yourself with ANSI-approved safety glasses and nitrile or neoprene gloves to guard against acid residue often found around older terminal posts.
| Item / Equipment | Purpose | Estimated Cost | Budget or Everyday Alternative |
|---|---|---|---|
| Digital Multimeter (DMM) | Measures DC voltage to assess static and resting state of charge | $20 – $60 | Basic analog voltmeter or 12V circuit tester |
| Safety Glasses & Nitrile Gloves | Protects eyes and skin against sulfuric acid splashes and road debris | $5 – $12 | Standard clear workshop glasses and dishwashing gloves |
| Terminal Wire Brush | Cleans corrosion from battery posts to ensure solid lead contact | $4 – $8 | Old toothbrush with a paste of baking soda and water |
| Microfiber Shop Towel | Cleans battery casing top to prevent stray voltage surface tracking | $2 – $5 | Clean cotton rag or heavy-duty paper towels |
| Dedicated Carbon Pile Load Tester | Applies real-world amperage load for definitive performance benchmarking | $45 – $120 | Vehicle starter motor under manual crank conditions |
Prepare your workspace in a well-ventilated garage or open outdoor area to prevent hydrogen gas accumulation. Good overhead lighting or an adjustable LED work light is essential so you can read polarity marks (+ and -) stamped on the casing without guessing. Clean the top of the battery case thoroughly before opening your meter kit; heavy layers of grease, moisture, and road dirt can form a conductive film that leads to parasitic discharge. If you are assessing tools based on an Amazon affiliate review, verify the build quality & durability of the probe insulation to ensure high resistance against sharp engine bay brackets and hot coolant lines.
Battery chemistry significantly impacts baseline voltage thresholds. Traditional flooded lead-acid batteries show a full charge at 12.6 to 12.7 volts. In contrast, Absorbent Glass Mat (AGM) and Gel units found in vehicles with start-stop technology boast higher product specifications, resting between 12.8 and 13.0 volts when healthy. Applying flooded battery voltage metrics to an AGM unit can lead to false diagnostic conclusions about system degradation.
Operating temperature and system configuration also alter electrical readouts. Testing in freezing conditions lowers chemical activity, yielding lower terminal voltage under load even if the pack is healthy. Furthermore, commercial vehicles or heavy diesel pickups often use dual-battery setups wired in parallel (maintaining 12 volts with doubled capacity) or in series (creating a 24-volt circuit). For accurate multi-battery analysis, disconnect the ground links and isolate each battery individually before testing.
Step-by-Step Guide to How to Test a Car Battery with a Multimeter

Learning How To Test A Car Battery With A Multimeter allows you to evaluate your vehicle’s electrical health accurately before investing in costly replacements. Whether you are conducting an Amazon Affiliate Review of diagnostic tools or checking your personal vehicle, this diagnostic workflow provides reliable performance benchmarking for any standard 12-volt lead-acid or AGM battery.
Prepare the Vehicle and Clear Surface Charge
Park the vehicle on a level surface, engage the parking brake, and switch off the ignition completely. Ensure all interior dome lights, headlights, radio units, and climate controls are powered down to eliminate parasitic draw. If the vehicle was driven within the last hour, turn on the high-beam headlights for 120 seconds (2 minutes), then turn them off and wait 5 minutes; this discharges residual surface voltage and stabilizes the battery plates for an accurate diagnostic reading.
Inspect the Terminals and Tool Build Quality & Durability
Examine the battery casing for bulging, cracks, or heavy white/green corrosion buildup around the posts. Clean dirty terminals with a stiff wire brush and a mixture of baking soda and water to ensure low contact resistance. Inspect your meter’s test leads; high build quality & durability in the probe insulation and terminal clamps prevents signal noise and false voltage drops.
Configure Multimeter to Direct Current Voltage (DCV)
Rotate the multimeter selection dial to DC Voltage, designated by a capital “V” next to a solid line over a dashed line. If using a manual-ranging tool, set the dial to the 20-volt scale, which matches typical product specifications for automotive electrical diagnostics. If using an auto-ranging multimeter, ensure the readout confirms DC mode rather than AC mode.
Connect Multimeter Probes to Battery Terminals
Insert the black probe lead into the meter’s common (COM) port and the red probe lead into the positive (volts/ohms) port. Firmly touch or clamp the red test probe to the positive battery terminal (marked with a plus sign “+” or a red cover). Firmly touch or clamp the black test probe to the negative battery terminal (marked with a minus sign “-” or a black cover). Ensure clean metal-to-metal contact.
Record and Benchmark the Resting Open-Circuit Voltage
Read the resting voltage displayed on the digital screen and compare it against standard performance benchmarking baselines at an ambient temperature of 70°F (21°C):
- 12.60V to 12.80V: 100% state of charge (healthy).
- 12.40V: Roughly 75% charged (acceptable, but requires monitoring).
- 12.20V: Roughly 50% charged (discharged, needs recharging).
- 11.90V or below: Fully discharged or dead cell (high probability of replacement needed).
Perform an In-Vehicle Cranking Load Test
Keep the multimeter leads connected to the battery posts while an assistant starts the engine. Watch the multimeter screen carefully during the 2 to 3 seconds of ignition cranking. Note the lowest voltage level reached during the start cycle.
A healthy battery will remain above 9.6 volts (at 70°F / 21°C). If the reading plunges below 9.6 volts during cranking, the battery lacks the cold-cranking amperage required to sustain normal starter load.
Verify Alternator Charging Output Under Load
With the engine running at an idle speed of approximately 1,500 to 2,000 RPM, observe the meter display. The charging voltage should settle between 13.7 volts and 14.7 volts. Switch on the air conditioning and high beams to load the system; if the voltage drops below 13.5 volts or spikes past 15.0 volts, the charging system or voltage regulator requires mechanical service.
Quality Verification Check
What Good Looks Like: The resting voltage reads steadily between 12.6V and 12.8V, momentary cranking drops no lower than 9.6V to 10.0V, and the running voltage maintains a stable range of 13.8V to 14.4V without fluctuating erratically.
Cold weather dramatically alters internal chemistry: at 32°F (0°C), a battery loses up to 35% of its cranking power, lowering the acceptable cranking threshold from 9.6V down to 9.1V. To eliminate probe slippage during ignition vibration, swap standard needle probes for insulated alligator clips attached directly to the base of the terminal posts rather than the clamp bolts.
Troubleshooting Matrix & Common Pitfalls to Avoid

Accurate electrical diagnostics require precision and good equipment. When learning how to test a car battery with a multimeter, unexpected numbers often stem from simple user errors or hidden vehicle draws rather than a dead battery. Refer to the diagnostic troubleshooting matrix below to identify strange multimeter readings and resolve them quickly.
| Symptom / Warning Sign | Probable Root Cause | Immediate Corrective Fix |
|---|---|---|
| Multimeter display shows 0.00V or negative voltage during a direct terminal check. | The test leads are reversed, or the meter probes are resting on heavy lead sulfate corrosion instead of bare metal. | Swap the leads so the red probe connects to the positive terminal and black to negative. Scrape away oxidation to expose clean lead before retesting. |
| Resting voltage reads falsely high (above 12.8V) immediately after turning the engine off. | The battery is holding a temporary “surface charge” from the alternator, masking its true resting state. | Turn on the high-beam headlights for 2 minutes to strip the surface charge. Turn them off, wait 5 minutes, and take the reading again. |
| Voltage drops below 9.6V during engine cranking, and the starter cranks slowly. | Degraded lead plates inside the battery can no longer deliver sufficient Cold Cranking Amps (CCA) under load. | Check the product specifications stamped on the battery case. If the battery is over 3 to 4 years old, replace it immediately. |
| Reading fluctuates wildly or will not stabilize on the digital readout screen. | Loose internal probe wires, poor build quality & durability of cheap meter leads, or an incorrect AC voltage setting. | Turn the dial to DC Volts (marked as V with a solid bar and dashed line). Firmly press probes against the center of the terminal posts. |
| Voltage stays below 12.4V even after the vehicle runs for 30 minutes. | Failing alternator charging system, worn serpentine belt, or severe parasitic drain drawing current continuously. | Start the engine and probe the battery. A working charging system will read between 13.7V and 14.7V. If lower, test the alternator. |
Executing reliable diagnostics requires avoiding common rookie mistakes. Relying on an incomplete Amazon affiliate review might lead you to buy a low-grade tool, but technique matters just as much as hardware. Keep these critical factors in mind when measuring electrical health:
- Testing with the Multimeter Set to the Amps Setting: Connecting your test leads to the battery terminals while the red probe is plugged into the 10A current port causes an immediate dead short. This will instantly blow the internal fuse of your meter and can melt the probe tips. Always verify your red lead is inserted into the port marked V-Ω-mA before touching any live car circuit.
- Confusing Surface Charge for True Battery Health: Checking resting voltage right after driving yields a false sense of security. A dying battery often shows 13.0V right after the engine shuts off, only to bleed down to 11.9V an hour later. Always allow the vehicle to rest overnight or burn off the excess charge before running your performance benchmarking tests.
- Ignoring Cable End Corrosion and Resistance: Probing the steel bolts on the battery cable clamps instead of the actual lead battery posts leads to false low-voltage readings. Road grime, acid residue, and loose clamps create high electrical resistance. Place your meter pins directly onto the raw lead posts of the battery to isolate the battery condition from bad wiring.
- Skipping the Dynamic Cranking Load Test: A resting voltage of 12.6V does not guarantee the battery can start an engine. Batteries can maintain normal voltage while having zero reserve capacity. Always recruit a helper to crank the engine while you monitor the screen. If the display plunges below 9.6V at 70°F, the battery has failed internally regardless of its resting number.
Decision Guide: DIY Testing vs. Battery Replacement or Professional Diagnostics
Knowing when to handle electrical checks yourself and when to hand the keys to an ASE-certified technician saves both time and money. While mastering How To Test A Car Battery With A Multimeter gives you immediate insight into your vehicle’s starting health, a simple handheld meter has mechanical and diagnostic limits. Use this breakdown to determine whether your situation calls for a quick home check, a direct battery replacement, or full-scale shop diagnostics.
Safe Self-Resolution and DIY Scope
Handling battery diagnostics at home is safe, practical, and highly cost-effective under specific, stable conditions. You should confidently manage this task yourself when performing:
- Routine Voltage Verification: Measuring the resting state of a healthy-looking 12-volt lead-acid or AGM battery to confirm it sits between 12.4V and 12.7V.
- Preventative Health Checks: Using a basic digital multimeter, often found via an Amazon Affiliate Review for home mechanics, to run basic Performance Benchmarking before winter or long road trips.
- Basic Connection Maintenance: Inspecting the physical posts for light surface oxidation, verifying that terminal clamps are torqued down, and assessing visible Build Quality & Durability without disturbing complex wiring harnesses.
- Alternator Surface Checks: Running the engine to confirm that charging voltage reaches between 13.7V and 14.7V at idle, showing that the charging system is sending current back to the cells.
When to Escalate: Replacement vs. Professional Service
Automotive electrical systems store immense cranking energy. A standard lead-acid unit can discharge 600 to 900 cold cranking amps instantly. In certain failure modes, continuing DIY troubleshooting poses physical risks or wastes time on hardware that is mathematically beyond recovery.
When to Purchase an Immediate Replacement:
- Permanent Cell Depletion: If your resting voltage drops below 10.5V, an internal cell has likely shorted or suffered irreversible sulfation. The unit will not reliably take a charge. Check your battery’s printed Product Specifications to match group size and cold cranking amps (CCA), then replace it.
- Cranking Voltage Collapse: If the meter displays a drop below 9.6V while turning the ignition key (assuming starter draw is normal), the internal lead plates can no longer support high-load discharge.
- Physical Deformities: Any battery displaying bulging sidewalls, cracked casing, leaking sulfuric acid, or a distinct rotten-egg odor must be replaced immediately. Do not attach meter probes to a swollen battery; internal hydrogen gas buildup creates an explosion hazard.
When to Escalate to a Certified Auto Electrician:
- Complex Parasitic Draws: If a fresh or fully charged battery consistently drains to empty within 24 to 48 hours, an active module or short circuit is pulling current while the car is parked. Isolating this requires advanced fuse-block monitoring and millimeter-wave amp clamps.
- Modern Battery Management System (BMS) Reset: Most late-model vehicles require the engine control module to be digitally registered to the new battery via a professional scan tool. Failing to register the battery causes the alternator to overcharge and destroy the new unit prematurely.
- High Alternator AC Ripple: If your multimeter reads more than 0.5V AC across the terminals while the engine runs, the alternator’s internal diode pack has failed. This leaks destructive alternating current into your vehicle’s sensitive computers.
| Decision Factor | Self-Resolution / DIY | Escalation / Replacement / Pro Service |
|---|---|---|
| Typical Time Required | 10 to 15 minutes | 1 to 3 hours (including shop turnaround or parts store trip) |
| Estimated Cost Range (in USD) | $0 (if you own a meter) or $15 to $40 for a basic tool | $120 to $250 (battery unit) or $150 to $400+ (shop diagnosis and BMS coding) |
| Skill Level Required | Beginner: basic safety discipline and reading DC voltages | Intermediate to Advanced: mechanical removal, electrical schematic tracing, or OBD2 programming |
| Equipment Needed | Digital multimeter, safety glasses, mechanics gloves | Dedicated carbon-pile load tester, OBD2 scan tool with BMS support, hand tools for terminal service |
| Risk Level | Low: passive testing with minimal electrical hazard | Moderate to High: chemical exposure, arc-flash burns, or vehicle ECU damage from incorrect jumping/coding |
Frequently Asked Questions
What voltage indicates a fully charged car battery when the engine is off?
A healthy, fully charged automotive lead-acid battery reads between 12.6 and 12.8 volts at resting state with the engine turned off. Any reading between 12.2 and 12.4 volts reflects roughly a 50 to 75 percent charge, while anything under 12.0 volts means the battery is discharged and requires immediate recharging or replacement.
Can a standard multimeter tell me if a battery has a bad cell?
Yes, observing resting voltage drops can quickly identify a shorted or dead cell. Because each lead-acid cell produces roughly 2.1 volts, a reading locked around 10.5 volts usually indicates one of the six internal cells has failed completely. Under these conditions, the battery cannot hold charge and will fail dynamic cranking tests.
Why does my battery show 12.6 volts but still fail to start the vehicle?
Resting voltage only measures electrical potential, not cold cranking amps under heavy resistance. A battery with degraded internal lead plates can display a false surface charge of 12.6 volts yet collapse under 9 volts the instant the starter motor engages. Conducting a cranking load test reveals whether the internal structure can still supply high amperage under load.
How do I use a multimeter to verify if my alternator is charging properly?
Start the engine, switch off all accessories, and place the meter probes across the battery terminals set to DC volts. A functional charging system typically registers between 13.8 and 14.7 volts at idle. If the meter registers below 13.5 volts or spikes over 15.0 volts, the alternator or voltage regulator is malfunctioning.
Do I need a high-end tool to learn How To Test A Car Battery With A Multimeter accurately?
No, an entry-level digital multimeter works well as long as it features clean DC voltage detection and decent leads. While professional units reviewed in an Amazon Affiliate Review often boast rugged Build Quality & Durability, basic meters meeting standard Product Specifications deliver sufficient accuracy for home garage diagnostics.
What is the minimum acceptable voltage during engine startup?
During the cranking cycle, battery voltage should remain above 9.6 to 10.0 volts for a standard 12-volt system at normal ambient temperatures. If the reading drops below this threshold while the starter turns, the battery is either heavily discharged or nearing the end of its operational lifespan.
Preventative Care & Long-Term Maintenance Schedule
Consistent diagnostic tracking and cleaning prevent premature sulfation and unexpected no-start conditions. Follow this structured schedule to protect your electrical system and establish reliable Performance Benchmarking data over the service life of your vehicle.
- Monthly Routine Checks: Inspect battery posts and cable clamps for white or blue-green powdery corrosion. Verify that hold-down brackets are firmly tightened to prevent road vibration from fracturing internal cell plates. Wipe the battery casing with a damp shop cloth to remove dirt and oily film that can create weak parasitic discharge paths across the terminals.
- Bi-Monthly Voltage Tracking: Pull out your multimeter and measure resting voltage before driving or at least twelve hours after parking. Logging these numbers helps catch weak charging patterns or parasitic battery drains before you end up stranded.
- Seasonal (Spring and Autumn) Inspections: Extreme temperature swings place severe stress on battery chemistry. Before summer heat accelerates water loss and winter cold thickens engine oil, conduct both a resting test and a cranking load test. Disconnect cables, scrub posts down to bare metal with a wire brush, and coat connections with dielectric grease or anti-corrosion spray.
- Annual System Benchmarking: Test resting voltage, cranking voltage drop, and alternator output under full load with headlights, defrosters, and the blower motor running on high. Compare your readings against original Product Specifications to evaluate battery wear and identify charging anomalies early.
Grab your multimeter now, set the dial to 20 volts DC, and take an initial resting measurement across your vehicle’s battery terminals. If the number sits below 12.4 volts, hook the battery up to a quality multi-stage smart charger immediately to break down early sulfation, restore full charge, and secure reliable starts for the road ahead.


